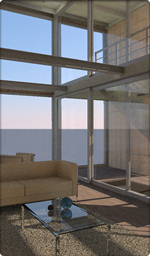
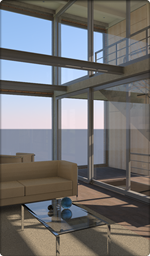
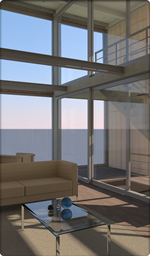
Rendering from Revit 2012
Rendering from AutoCAD Drawings
Content
Revit Quick StartBefore You Render
Uploading
Data Security
Settings
Rendering
Viewing, Downloading and Deleting
Troubleshooting
 Rendering
|
Set up 3D views, lighting and other parameters in Revit, exactly the way you want them, before using the Render Online feature. Read on for additional preparation tips.
3D Views
The rendering service relies on 3D views created in Revit. You can render any or all of the 3D views found in your project file. The service does not work with 2D views.Sun Settings
Materials
Only the Still and Lighting types of Solar Studies are supported at this time. Views using Single Day or Multi-Day Solar Study settings are not supported.The renderer is a new highly optimized engine and is not the same as Revit. Some differences in materials appearance are expected. Projects created with Revit versions prior to 2012 are translated to the Revit 2012 format when opened in Revit 2012. Rendered results may look different after this translation. Textures
Only image-based textures are supported at this time. Procedural textures, (Checker, Gradient, Marble, Noise, Speckle, Tiles, Waves, and Wood) are not supported.
Revit files cannot be uploaded directly to the rendering service. Instead, use the Neon for Revit 2012 add-in to access the service directly from within Revit 2012.
Previously rendered files are saved securely in your account, making it unnecessary to re-send a file when you want to render more images from it later.
There are two ways to use a previously uploaded file:
1. On the Select a Source File screen, select a previously uploaded file or an Autodesk sample file from the list at the bottom of the page, then click Continue to advance to the Adjust Settings screen.
2. On the My Render Gallery screen, click on the thumbnail menu from any thumbnail image and select Re-render using new settings…
Revit project files are never uploaded directly to the rendering service. Instead, translated files containing just enough data to render accurately are created by the add-in and uploaded to the service, where they are stored at a secure data center. Your translated rendering files cannot be viewed or downloaded by anyone. Only a person signed into the rendering service with your user name and password can access the files, and then, only to render them with the service.
After clicking "Render Online" from the Web Services tab in the ribbon the Render Online dialog box appears. Use the controls in this dialog box to set up the renderings of your Revit project.
You can adjust the following settings:

|

|

|

|
| Draft | Standard | High | Best |
| Quality Variables | |||||
| Setting | Eye Rays | Reflection Samples | Lighting Accuracy | When to Use | Speed |
| Draft | 0.25 | 1 | Low* | Optimized for speed. Perfect for a quick preview of your scene. | 1x |
| Standard | 4.0 | 1 | Low | More accurate than Draft. Perfect for quick visualization during design. | 4x |
| High | 16 | 8 | Med | Greater detail than Standard. Perfect for high fidelity presentation work. | 10x |
| Best | 32 | 16 | High | Lower noise and broader tonal range than High. Perfect for archival rendering, when speed is not a priority. | 20x |
By default you will receive an email notification when all your images are ready, or if there are any errors that need your attention. Uncheck this option if you do not want to be notified by email.
Click the Start Rendering button at the bottom of the screen to start rendering.
After clicking the Start Rendering button on the Render Online dialog box your scene will be translated and uploaded to the rendering service, where it will be queued for rendering.
If you wish to monitor the progress of a rendering, click My Render Gallery from the Web Services tab in the ribbon. The My Render Gallery screen will open in your web browser. Here you can view your completed images and monitor any renderings still in-progress.
A small progress bar appears beneath each image as it is being rendered. Hover over the image with your mouse cursor to reveal an information popup with the details of the image.
Click the Cancel Rendering button on any in-progress thumbnail to stop rendering the image. Canceling a rendering in progress cannot be undone. Click the New Rendering button to start over if you cancel a rendering by mistake.
Once rendering has begun you are free to close your browser window. Check the box Email when complete to receive a notification when your images are ready. Sign in to the rendering service at any time to monitor in-progress renderings and review your completed images.
Once an image is rendered it is viewable in a gallery of images from the same source file on the My Render Gallery screen.
Navigate the images in galleries containing more than 7 images using the left and right arrow buttons on either end of the row of thumbnails.
Hover over a thumbnail to review the rendering and image details.
Click on a thumbnail to open a larger preview image of the rendering in your browser window. If the preview is already showing, click the thumbnail to hide it again.
Hover over a thumbnail's ![]() icon to select actions:
icon to select actions:
Re-render using new settings…
Set up one or more new renderings based on the same source file as the image.Render as Panorama
Renders a full 360 degree panorama of the current view. See below for more details.Show preview image
Open a larger preview image of the rendering in your browser window.Download image
Download the full size rendered image to your computer.Delete image
Permanently delete the image from your gallery, (cannot be undone). Click "Delete All" in the title bar of a gallery if you no longer want any of the images in that gallery.
Panoramas are full 360 degrees views of the scene from the current view camera position. The quality and size of a panorama image is dependent on the quality and size of the view used to create it. if the panorama quality looks poor, re-render the view with a better quality and larger image size, and then create a panorama from the new higher quality image. Panoramas are visible through an embedded panorama viewer. Use the mouse to explore the 360 degrees environment.
Installing the Revit Add-in:
My rendered images don't look like I expected them to:
My rendering does not update or respond:
Unsupported features:
Differences with the Rendering tool in Revit: